Ways to make mushroom mycelium yourself

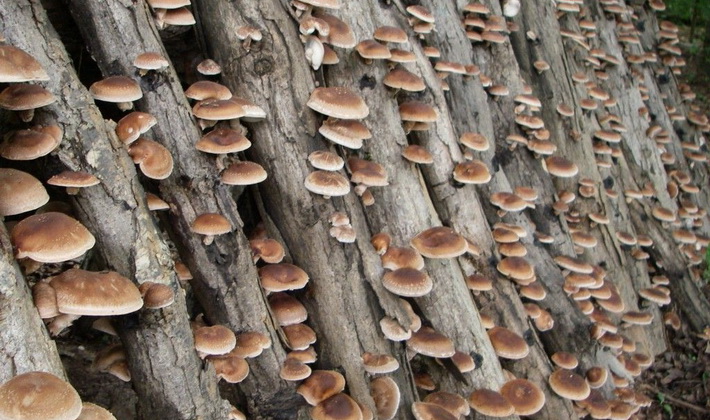
In nature, fungi are mainly propagated by spores, but this process can also be carried out using pieces of mushroom tissue, which has long been established by mushroom growers using wild-growing mycelium as a planting material.
How to make mycelium at home is described in detail on this page.
Content
How people used to grow mycelium
Previously, in order to grow some types of mushrooms, for example, champignons, people looked for dung heaps and took mushroom pickers from there. If the weather was unfavorable, and there were no mycelium in landfills, then it was propagated in special exploratory greenhouses. To do this, manure soils (substrate) were prepared and the mycelium was planted there, without filling it with earth, so that fruiting would not occur. After waiting for the almost complete germination of the mycelium in the substrate, the mushroom growers took out the mycelium and used it as a planting material. Such a slightly dried nutrient medium could persist for a long time.
In Russia, champignon planting material in a similar way was obtained back in the 30s. XIX century However, when growing mycelium using this method, the yields were poor, the mycelium degenerated quickly, and during planting, alien microorganisms were often introduced that interfered with the normal development of the fungus and reduced fruiting, and therefore scientists continued to look for new cultivation methods.
At the end of the XIX century. in France, they obtained a sterile mushroom culture of champignon grown in a special nutrient medium from spores. When preparing mycelium under pure conditions, the potential of the mycelium increased significantly, it quickly took root, intensively grew in a nutrient medium and fructified much earlier than when using wild hyphae.
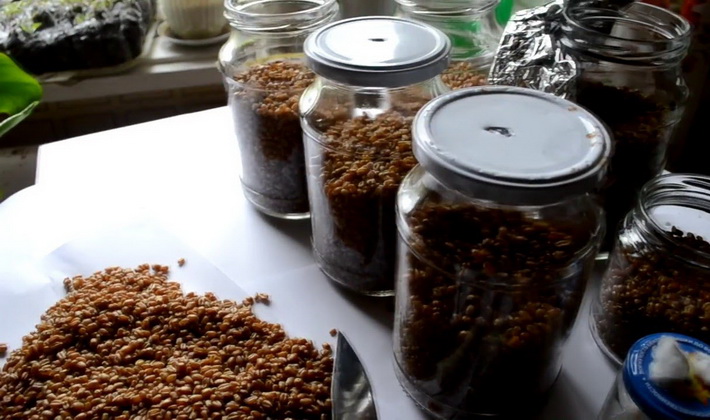
Since the mid-20s. XX century In many mushroom producing countries, laboratories functioned, not only knew how to prepare mycelium, but also how to achieve excellent fruiting. In the 30s. in the USSR, in addition to obtaining mycelium on sterilized compost, other nutrient media were also actively sought. In 1932, a method for cultivating mycelium on wheat grain was patented. At the moment, most mushroom growers around the world are engaged in the cultivation of grain mycelium.
Cons of growing grain mycelium
As practice shows, in order to obtain mycelium, millet, barley, oats, wheat, corn, rye and other cereals are most often used.When breeding oyster mushrooms and other crops that develop in nature on wood, sowing mycelium is prepared on grain, sunflower husk, grape squeezed, sawdust, etc.
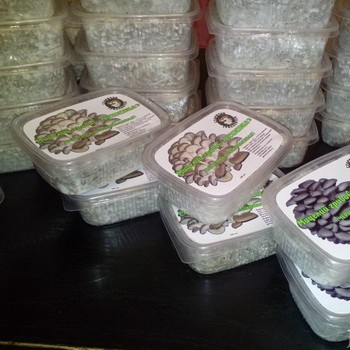
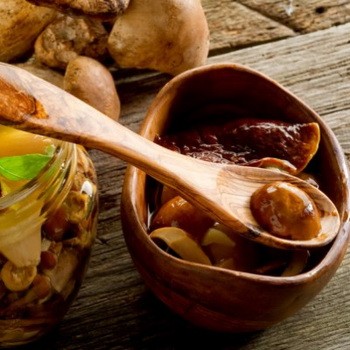
Depending on the type of nutrient medium on which the mycelium grows, they distinguish between grain, substrate, liquid mycelium, etc.
All these types of mycelium are shown in the photo:


Liquid mycelium is practically not widespread, substrate substrate is used a little more often, but grain is mainly used. Due to the fact that grain mycelium due to the nutrients of grain provides accelerated growth of mycelium, it is used in industrial mushroom growing.
However, the preparation of such mycelium in industrial or domestic conditions has its drawbacks. First of all, these are increased requirements for the quality of grain sterilization. If this procedure is unsuccessful, then mold will appear that impedes the normal development of mycelium, which will necessarily affect the volume of the crop.
The short shelf life of grain mycelium (2-3 months) is also a significant minus. In addition, it must be stored without fail in a refrigerator at a temperature of + 2-5 ° C, as this will inhibit the development of mycelium. If the temperature is higher, this will lead to continued growth of the mycelium, as a result of which it will quickly consume food and die.
By the appearance of the mycelium, it is impossible to establish the time for its manufacture. The only thing that can be recommended in this case is to be vigilant when purchasing it on the side, because the storage conditions may not have been met. The fact that the mycelium is of poor quality, the beginning mushroom grower will find out many months later, when it will be in vain to wait for the harvest.
Another disadvantage is the fact that the mycelium accustomed to grain will not “want” to move to wood.
With substrate mycelium, the situation is different, and its only minus is slightly slower growth, but there are more advantages: sterility, the ability to store at room temperature for a year.
Amateur mushroom growers, as a rule, prefer substrate mycelium when cultivating mushrooms on wooden segments, since the rate of germination here does not matter. This process continues for several months due to the high density of the tree.
It is important to know that mycelium of any kind dies if it is heated above 30 ° C.
Whole organizations are engaged in the production of mycelium, where optimal conditions for its cultivation are created. Some get mycelium at home in the hope of earning a little. Its quality does not always satisfy the necessary requirements, but, in fairness it is worth noting that sometimes very good specialists also meet.
Of course, fungi can be propagated by spores, but propagation using mycelium is much preferable for a beginning mushroom grower, since it gives a better chance of success.
Further, the process of obtaining mycelium is considered in detail, since it is sometimes just necessary to grow it yourself, for example, if for some reason the mycelium obtained in natural conditions (for example, pieces of wood or soil penetrated by mycelium) is not enough.
The key points for making mushroom mycelium with your own hands are as follows. First, a sterile fragment of the fungal tissue is removed and transferred to a nutrient medium (this occurs in several stages, which will be discussed below). Then, several samples are formed from the main culture, with particular attention to measures to prevent infection of the culture. Next, create the environment and conditions that contribute most to the fruiting of the fungus.
In the process, the culture undergoes the following changes: sterile culture on agar medium, sterile culture on grain (grain mycelium) and, finally, fruiting in a pasteurized culture medium.
The word "sterility" may scare some beginners, but it is absolutely necessary to protect the mushroom culture from the numerous sources of infection that are present in the environment everywhere, no matter how clean the room is. It is very important to prevent their getting into the cultivated culture, because otherwise there will be a “struggle” for the nutrient medium, and it should be used exclusively by the mushroom culture.
With a certain accuracy and practice in performing fairly simple techniques, any person can carry out the sterilization process.
The following describes how to prepare agar for mycelium fungi.
How to get mycelium agar at home
Before preparing mycelium at home, you should prepare an agar culture medium. Agar made from seaweed along with additional components is often used for primary cultivation and subsequent isolation of mushroom culture.
Experts add various nutrients to the agar, for example, minerals, antibiotics, etc. The value of the agar medium lies in the fact that microorganisms that cause infection can be easily detected on the surface of the medium and thus there is the possibility of eliminating them early stages of cultivation.
As practice shows, you can make the mycelium yourself in different types of agar media. Most often, potato and malt-dextrin agar are used. They can be made independently or purchased in the store ready-made mixtures of industrial production.
By purchasing agar in the store, you will have to spend a little more money, but the additional costs are compensated by ease of use, and in the presence of finances and lack of free time, ready-made mixtures will be the best choice.
If you are used to do it yourself, then, according to experts, potato agar for mycelium of mushrooms at home can be prepared in two ways. Both methods differ little from each other. In addition, having familiarized themselves with them, each mushroom grower may well come up with his own way.
In any case, in order to make mushroom mycelium in the right way, the right technology requires preparation: measuring cups, cotton bandage, aluminum foil, pressure cooker, tubes with screw caps for autoclaving (can be found in medical equipment stores), a small funnel for filling tubes , 2 bottles with a volume of 1 l, flasks with a narrow neck.
Next, you will learn how to make potato agar for mycelium in the first way.
The first way to prepare potato agar
Estimated yield of the substance is 1 liter.
Ingredients: 300 g of potatoes, 20 g of agar (it can be found in the relevant organizations providing materials for medical laboratories, health food stores or in Asian food markets), 10 g of dextrose or some other sugar, 2 g of brewer's yeast (you can do without them )
Process work.
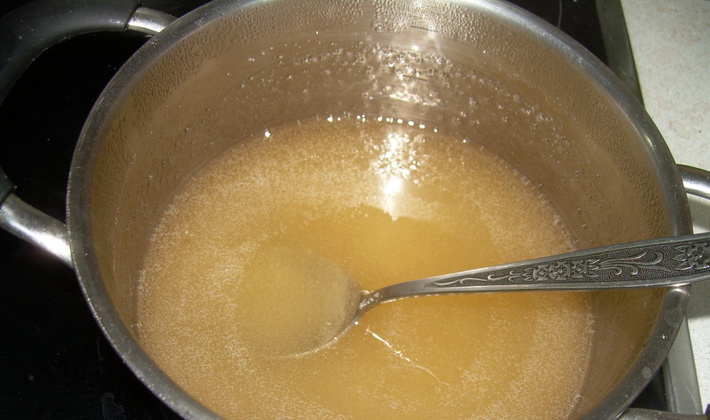
Step 1. Before making agar for coarse mycelium, you need to boil the potatoes with 1 liter of water for 1 hour. Next, remove the potatoes, leaving only a decoction.
Step 2 Mix broth, agar, sugar and yeast (if you use them) thoroughly, for example, using a whisk for whipping, you can not beat this mixture.
Step 3 Pour the resulting mixture into bottles or flasks in half or three quarters of their volume.
Close the necks with cotton swabs and wrap with aluminum foil. Pour water into a pressure cooker so that its layer from the bottom of the dishes is 150 mm, and install a grid on which to place bottles or flasks. Place the lid on the dish and snap the latches in place.
Step 4 Put the double boiler on the fire and wait until the steam goes. After ventilation, close the valve for several minutes (depending on the specific model and in accordance with the instructions). Bottles are boiled at 121 ° C (1 atm.) For 15 minutes.In this case, it is necessary to ensure that the temperature does not exceed this level, because in this case the caramelization of the medium will occur, which will finally ruin it.
Step 5 After 15 minutes, turn off the stove and leave the dishes to cool (about 45 minutes). Then, without wasting time, take free tubes, remove the caps and place the containers on a tripod or in clean cans, and then place them on a surface previously cleaned of dust and dirt.
Step 6 After cooling the bottles with the nutrient medium, remove them from the pressure cooker with a towel or kitchen mittens. Slightly mixing, remove the foil and tampons, using a funnel, pour the contents into test tubes by about one third.
Step 7 Close the tubes with caps, but less tightly than before, install them in a pressure cooker, pouring excess water from there if necessary. Having achieved a temperature of 121 ° C, leave the dishes on fire for 30 minutes, then leave them to cool slowly again until the pressure reaches a normal level.
Step 8 Take out the tubes and screw the caps tight. Lock tubes in an inclined position. As a result, the surface of the agar medium should be at an angle with the flask, thus creating as much area as possible for the subsequent development of mycelium (such tubes are sometimes called “oblique agar”).
As the medium cools, its consistency becomes more and more jelly-like and, in the end, hardens so much that the tubes can be placed vertically, and the agar medium remains in the same position.
This video details the preparation of agar for mycelium:
Test tubes can be used immediately or in weeks, or even months. In the latter case, they must be placed in the refrigerator, and before use, make sure that there are no traces of mold or bacteria infection on the medium.
The next section of the article is devoted to how to get potato agar for mycelium at home in another way.
How to make agar for mycelium at home in another way
Estimated yield of the substance is 1 liter.
Ingredients:
- 284 g of potatoes
- 21.3 g (3/4 oz) agar,
- 8 g of dextrose (table sugar can be used instead)
Process work.
Step 1. To make mycelium agar with your own hands, you need to wash the potatoes and cut it into small pieces, leaving the skins, and then boil in 0.5 l of water until fully cooked. Remove potatoes and their debris. Pour 1 liter of water into iron or glassware and add dextrose (sugar), broth and agar to it.
Step 2 Dissolve agar. To do this, put the resulting agar mixture in a container covered with aluminum foil, put in a pressure cooker. Heat the pressure cooker to 121 ° C (1 atm.) And leave. After 20 minutes, the agar will completely dissolve. Then turn off the stove and let the pressure cooker cool down slowly.
Step 3 Using kitchen mittens or towels in test tubes (or small bottles) pour the mixture with dissolved agar one third of the volume. Place the tubes on a tripod or in cans. Pour the remaining agar into the bottle, close it with a cotton or sintepon swab and sterilize later, along with the remaining tubes.
Tightly close caps of test tubes or caps. In this case, the pressure during the sterilization will be equalized. If cotton or sintepon tampons are used for closing, you do not have to worry about equalizing the pressure, however, the tubes should also be covered with aluminum foil, otherwise the condensation of the cooling pressure cooker will get on the tubes.
Step 4 Sterilize agar, for which test tubes (bottles) with it are installed in a pressure cooker and kept at a temperature of 121 ° C (1 atm.) For 25 minutes, not including the time taken to achieve the required pressure. Then turn off the stove and let the dishes cool slowly.You should not allow a quick decrease in pressure, because of this, agar in tubes can boil, splash out through tampons and caps of the tube, which is likely to lead to infection.
Step 5 At the final stage, the mixture in the tubes acquires an inclined position. To do this, wipe the surface on which the tubes will be wiped with a 10% solution of bleach containing chlorine. There should be no drafts in the room.
Using kitchen mittens or a towel from a pressure cooker, remove the hot tubes and place them on the table in an inclined position, leaning the container at one end to an object. Before that, it is advisable to choose the correct angle of inclination using any foreign objects (bars, a stack of magazines, etc.)
When the agar begins to solidify, turning into jelly, close the caps (stoppers) in the tubes more tightly.
Test-tube potato agar is stored in a cool, dust-free place.
Watch the video how to make agar for mycelium with your own hands:
The final section of the article is devoted to how to properly grow mushroom mycelium.
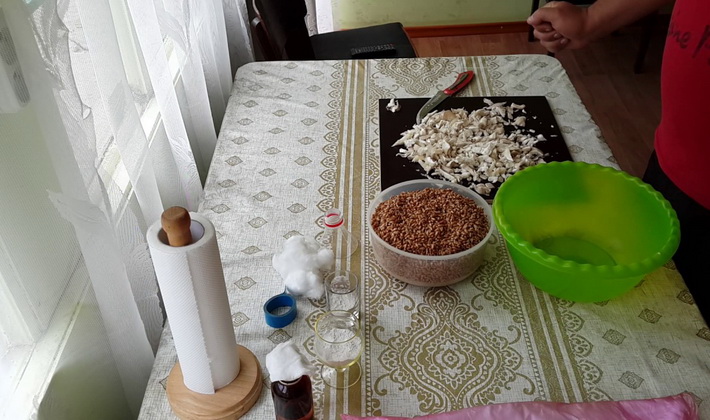
How to cook mushroom mycelium at home
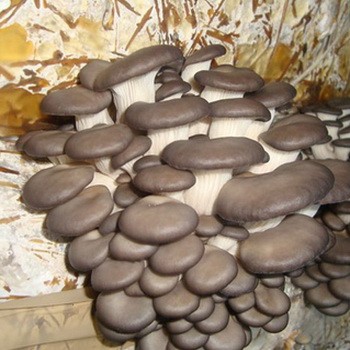
Before growing mycelium at home, prepare: a scalpel (sharp knife with a thin blade), an alcohol lamp (propane burner with a spray can, a lighter or matches), iron cans or racks for test tubes with oblique agar and finished tubes, a holder for a scalpel or a knife, a microporous bandage (a standard bandage can be used), a spray bottle with a mixture consisting of 1 part bleach with chlorine and 9 parts water (optional), a fresh, clean fruit body of the mushroom (if you are a beginner, it is best to take oyster mushroom).
Process work.
Step 1. Before growing mycelium, you need to prepare a stable surface (table, counter), washing it with warm soapy water and wiping it dry. To ensure additional disinfection, treat the surface with an aerosol with a 10% bleach solution, thoroughly wipe with a clean rag or paper towel. Lock the windows, trying to exclude air circulation as much as possible. It is better to carry out work in the morning when there is little dust in the air.
Step 2 To grow the mycelium at home, you need to organize a workspace: lay out tools and materials within reach and in a convenient manner, ready for work.
Take agar tubes and place them in iron cans or on racks. Turn on the light and thoroughly sterilize the knife blade (scalpel) on fire, put it on a stand, for example, made of wire. A stand is needed so that the knife blade can always be near the fire while the tool is not in use.
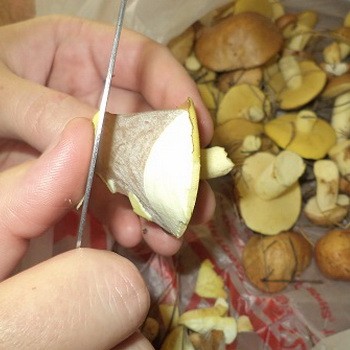
Step 3 Take fresh clean mushroom. Although there may well be many pathogens and molds on its outer surface, there are usually no organisms in the internal tissue that can cause infection, of course, if there is not too much water in the fungus.
To break off part of the fungus, it is impossible to cut it off, since the blade infects the inside of the fungus with bacteria from the outer surface. Put the mushroom on the table with a dirty surface (clean should not be in contact with the table).
The bottom line is that you need to form a clean open surface, and from it later take a small piece of mushroom tissue, which is placed in a test tube.
Step 4 In order to grow the mycelium itself, arrange the tools and materials so that the tube is opened as little as possible before filling the fungal tissue. To reduce the likelihood of infection, the test tube (or cork, cap) should not be placed on the work surface, which is quite difficult, so it makes sense to pre-train with an empty test tube.
Step 5 The further sequence is to a large extent determined by whether the right-handed person or the left-handed person performs this work, the actions of the right-handed person are described below.
The thumb of the left hand is down, while the others are horizontal. Place the tube between the middle and ring fingers.In this case, the ring finger is on top, the middle finger is on the bottom of the bulb, and the cork (cap) is directed away from the hand. It is not necessary to tilt the tube, only a horizontal position is required here, otherwise particles flying in the air will have more chances to penetrate the neck of the container. The orientation of the tube is such that the beveled surface of the agar is directed upwards. It is on it that mushroom tissue will be planted.
Step 6 Carefully remove the stopper (cap) from the tube and take the latter in the indicated manner.
Using a free index finger and thumb of the left hand, take a piece of mushroom with a clean surface. With your right hand, quickly pick up the scalpel as if it were a pencil or pen. Carefully disconnect a small piece of triangular mushroom from a clean mushroom tissue with the tip of the blade and, immediately, not a second, place it in a flask on the edge of the neck, shaking off the tip of the scalpel with tapping movements, if necessary. Put the scalpel back in place and quickly close the tube with a stopper.
Step 7 Tap on the hand a little with a test tube so that a piece of mushroom moves on the agar surface. Place the tube in another tin intended for storing inoculated tubes.
With the exact implementation of the recommendations, there are considerable chances that the transplanted mushroom culture was clean.
A similar sequence of actions is performed with other flasks and mushroom material. It is important to prepare several test tubes from one mushroom, because no matter how neatly and cleanly the work is carried out, infections often occur.
After the fungal material is introduced into the tube (this process is called inoculation), the scalpel must again be sterilized on fire.
Having finished with the tubes, you need to close the stopper as tightly as possible and wrap the place with microporous tape, which will not prevent the fungus from “breathing” and at the same time prevent bacteria from entering the tube through the neck.
It is advisable to place stickers on each flask or make inscriptions with a marker indicating the date and information about the contents.
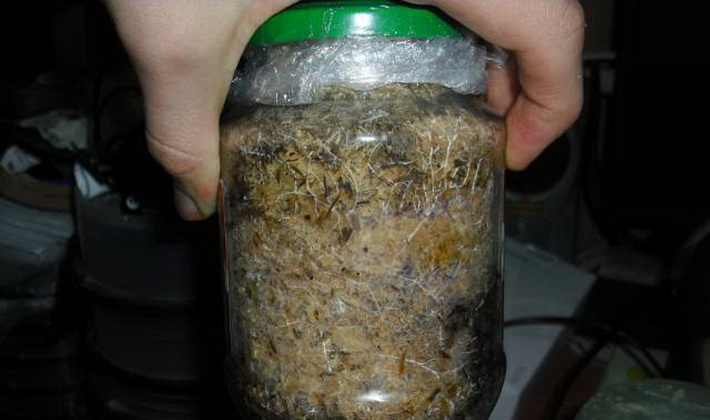
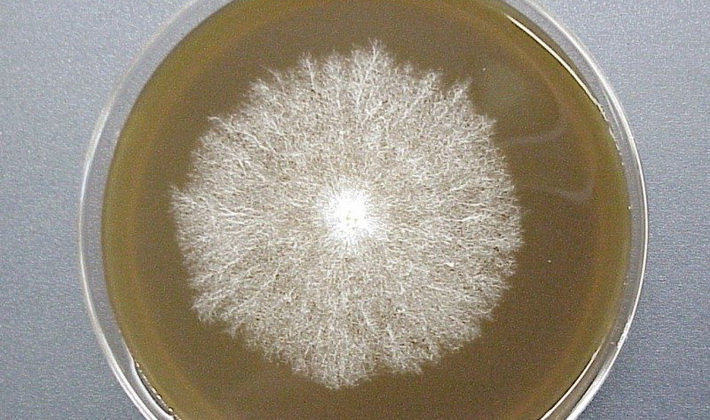
Ready tubes are stored in a dark and cool place at an optimum temperature of 13-21 ° C. After a certain time (several days or a week), the mushroom tissue will grow in fluff, which indicates the beginning of the development of mycelium. A few weeks later, the mycelium will fill the entire surface of the agar.
In the presence of mold, which can be easily recognized by spores of green or black colors, or bacterial infection (as a rule, it looks like a colored glossy substance), the contents of the tube should be immediately discarded and washed with a stopper in hot soapy water. If possible, infected tubes are uncorked in another room where there are no healthy crops.
Details on how to grow mycelium are described in this video: